1957 Corvette RestoMod Story – Page 19
Sanding & Polishing C4 Suspension, Part 1
My 1957 Corvette project is not supposed to be a show-car-quality restoration. I want to drive the car as much as possible; which means tar, rocks, and other road hazards will eventually have bad effects on the car’s undercarriage and body.
But there is also an old adage that says, if you’re going to do a job, do it right. In this, and the next, page I show you what can happen after disassembly of the old C4 suspension parts. More than just cleaning, sometimes they need to be brought down to bare metal. Other useable parts need media blasting, sanding and polishing. Specialty tools and supplies are required for every step of this process. So let’s make “man jewelry”!
Let’s look at the control arms from my 1996 Grand Sport donor. In previous pages I told you they were in pretty good shape, except for a few road dings and weathered areas. Now I could clean these up and sand them and they would look good and function well.
But that would not be doing the job right to me. So I’m going to the next level. Read on and see how I make these lifeless components have BLING! Or just buy my book and see every detailed step.
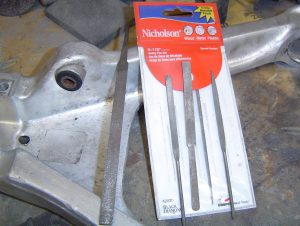

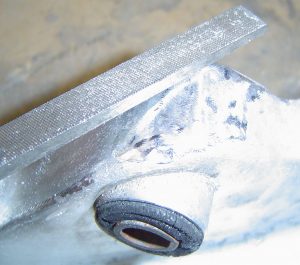
For most all fine metal work, a set of small hand files are needed. Most hardware or home improvement stores carry these at reasonable prices. A pneumatic die-grinder is also very useful – but requires an air compressor and hoses. The die-grinder can be fitted with several attachments that change the metal’s surface.
Pictured above right, the die-grinder has a Dremel mini-flap wheel attached – for small spaces. Larger flap wheels are also available at Lowe’s or Ace Hardware. Also, 3M Roloc disks are handy, but aggressive. Because the C4 suspension pieces are cast aluminum, the metal is very soft and can be ruined if you become careless with these tools. Go slow, and be careful with power sanding tools.
If you are doing any substantial restoration of old parts yourself, you are well-advised to buy the specialty tools needed. The alternative is to take your parts to a restoration shop and pay through the nose.
I can tell you that having my ’72 LeMans Station Wagon rebuilt a few years ago, and having restorers do most of the work, the labor charges choke the life out of your checkbook. The work is done extremely well, but I always had a hollow feeling in my gizzard when writing the checks.
My book on this 1957 Corvette RestoMod project lists all the tools you need to duplicate what I have done. Air tools are definitely on that list. A media blast cabinet is also very useful, and a commercial buffer/polisher is definitely needed to shine these components.
Larger blemishes or gouges require a file to smooth them. Files are the most aggressive tool to remove material, so go slow – it’s easy to misshape the part.
Next was the die-grinder and flap wheel. Used carefully, this takes off a small amount of material and flattens the surface.
Then comes hand sanding. Filed areas use lower grits, but most surfaces respond well to 150-grit then 220-grit paper.
Finally, sanding pads up to 320-grit is the final step.
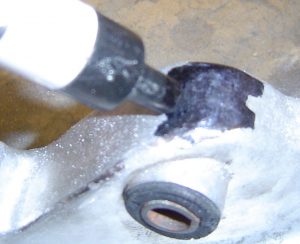
At left, a lower control arm’s bushing mount had numerous dings. A good way to file down the dings is to coat the area with a magic marker, then file.
At right, you can see the low spots keep the marker’s ink – telling you where the low spots are. File carefully so you don’t ruin the part.
After sanding completely, and all surface imperfections are gone, it’s time for the buffer/polisher.
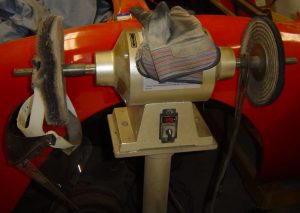
At left is what looks like a bench grinder, but look again. The arbors are extra long and stick far out from the motor. This allows parts to easily be moved around the spinning buff wheels.
The buff wheels turn at very high rpm’s. If you are not using the correct technique, the part will be ripped right out of your hands – possibly injuring you severely. There is also buffing compound debris that can hit your eyes.
High-speed buffers can be very dangerous, so I consulted a book and video on the subject. Then, I slowly practiced. A good reference book is How To Restore Metal Auto Trim by Jeff Lilly. I’m sure it’s available somewhere online.
TP Tools, Eastwood, and even Harbor Freight sell all the buffers, stands, wheels, compounds and accessories you need to perform this really interesting, albeit tedious, work. Below are some results…
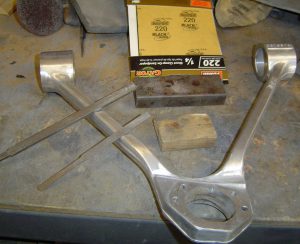
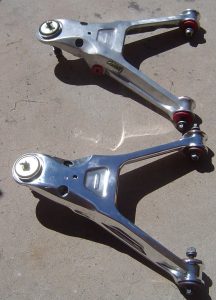
Below are the lower control arms. The top arm is sanded to a nice satin finish. The bottom arm is buffed to a brilliant shine.
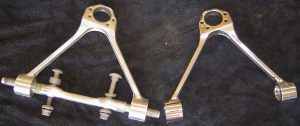
The above photo shows both upper control arms. The left arm is sanded only and ready for buffing. The right arm is sanded and buffed and is really shiny. Note how the right arm almost looks like it’s been chromed.
My wife said I was making “man jewelry”.
A media blast cabinet is a fairly expensive tool (below). They usually don’t come with all the accessories to start. And you also have to buy blasting media.
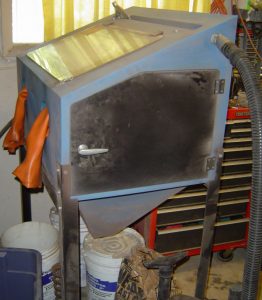
You can always take your parts to a blasting business, but you’ll pay the man – and that gets really expensive.
Several online vendors have blast cabinets and accessories including Harbor Freight and TP Tools.
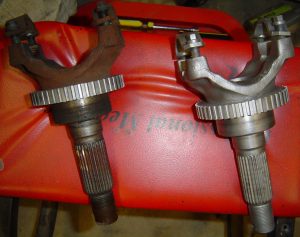
Above are two C4 axle yokes. The blast cabinet made short work of removing surface rust and grime from the one on the right.
Some people may say sanding and polishing the suspension pieces is a waste of time – especially if the car will not be a show car. I say – blast that opinion!
In fact, the front and rear suspension pieces have all be sanded and polished as described on this page. And even the stainless exhaust, aluminum driveshaft, and a fabricated battery box are polished to a brilliant shine.
Why? Because it’s my project and I want to do the best possible job. Even if nobody sees the “man jewelry” in the chassis, I’ll know it’s there. And Chapter 13 of my book covers all of this in superb detail.