Replace C4 Rear Bushings & Universal Joints
About Chapter 8
In this detailed chapter, I show you the easy and correct ways to remove and install all rear suspension bushings, and axle shaft u-joints on the C4 Corvette.
These too-often overlooked parts are critical to driving safety and suspension longevity – not to mention even, long tire wear.
With 41 steps and 78 photos, all bushing and u-joint procedures are covered in great detail.
The new Energy Suspension polyurethane bushings are much stronger than the old rubber ones. I used my shop press to remove the old ones, but I also show you alternate ways of doing this.
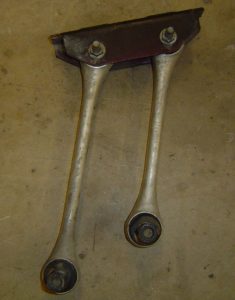
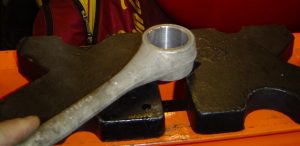
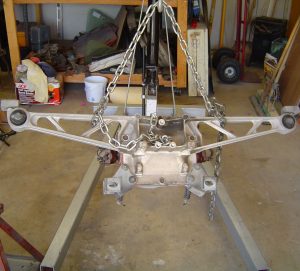
Shown above are the upper and lower control rods we took off of the donor rear-end in Chapter 6.
Bushings are at each end and need replacing. The rods are also called “dog bones” because of their shape.
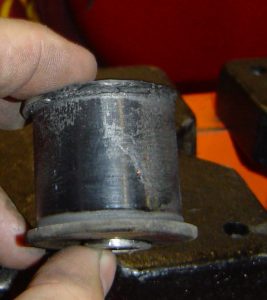
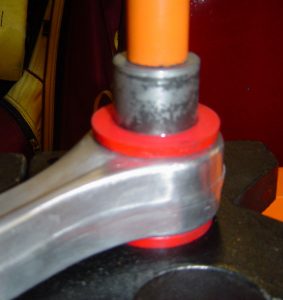
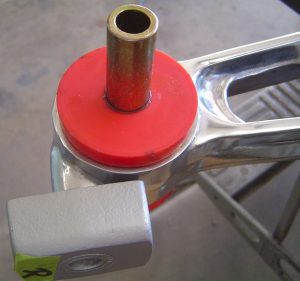
Shown above is a stock control rod bushing. Each bushing has an inner steel sleeve where the fastening bolt goes.
Also called trailing arms, the control rods on the C4’s suspension are a variation of the heralded 4-link setup.
Chapter 8 starts by giving you a few choices for bushing parts, from street only to full-on racing components.
Then the tools needed, both required and optional, are listed for you. Optional tools are shown because many times they make the job easier, but are usually expensive.
Next, each of the suspension pieces that have bushings are shown intact and installed, then fully described for you.
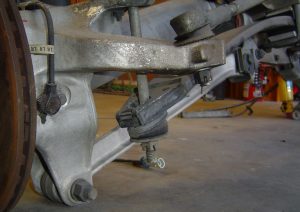
Then we cover the spindle rod bushings – commonly called camber rods as they adjust the camber of the rear tires.
Two types of camber rods were used on C4’s and I give you new bushing part numbers for each.
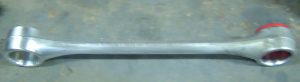
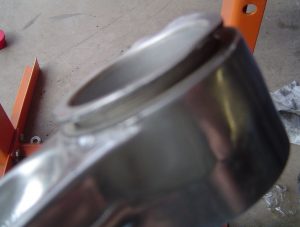
The above photo shows the spindle rod – it’s the straight piece that connects to the knuckle and the bottom of the carrier body.
The connection at the carrier has fasteners called cam bolts which allow for movement of the cam rod to adjust the camber.
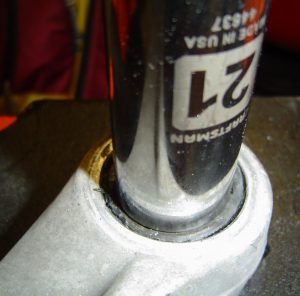
My shop press was used to press out the old, worn out rubber bushings from the cam rods.
Some technicians will tell you it’s okay to just beat on the socket with a hammer until the bushing is pushed out.
But I say, why would you want to hammer away at a cast piece of aluminum?
Besides, many more jobs will need this little shop press before this project is done.
The spindle (cam) rods have an inner steel sleeve that goes in last.
With steel pieces like this inner sleeve, even a bench vise is better than pounding with a hammer – don’t Bubba things like that.
On many bushing replacement steps, I offer alternative methods besides using a shop press. However, the press is the best way.
The chapter goes into replacing the carrier support arm bushings next.
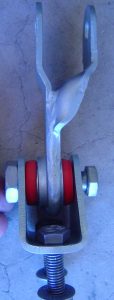
In the photo above, these large bushings are at both ends of the carrier support arm – called the batwing because of its shape.
The eyelets of the carrier support arm are bolted to the re-engineered stock frame, and the bushings “cushion” the connection.
For the Energy Suspension carrier bushings to fit properly, they require the inner sleeve of each eyelet to be pressed out.
In the photo above, the sleeve has been partially pressed out. I give you all the tools used to complete this important step.
If you don’t know what you’re doing here, damage to the carrier arm could happen. It’s why I wrote this book!
All bushings and sleeves, including special grease, are included in the Energy Suspension kit.
You can also get the polyurethane bushings in black if you don’t like red.
I thought Corvette bushings should be RED!
Very cool.
The rear sway bar is connected to the frame at one end, and the steering knuckle at the other. The frame connection uses large donut-style bushings.
No need for the shop press here, these large bushings clamp around the sway bar with ease.
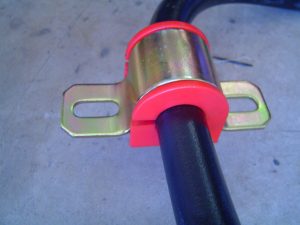
The knuckle connection of the sway bar has bushings in both the sway bar eyelets, and the end links.
The end-link and sway bar eyelet bushing removal can be tricky. Again, outside shells are the reason.
But I show you a few tricks of my own to make the removal and install process much easier.
I also give you my process for restoring the end-links before new polyurethane bushings from Energy Suspension are installed.
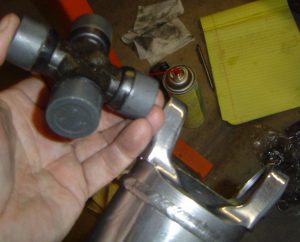
The correct u-joint part numbers are sourced for you – I bought mine from Rock Auto online.
This chapter is a must for those looking to replace any or all of the bushings and universal joints in the 4th generation Corvette.
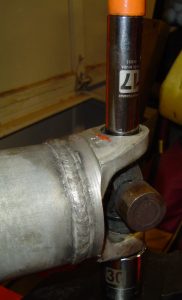
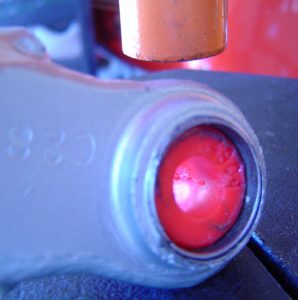
A shop press is one of the required tools to work on the aluminum axle shafts and u-joints. Banging away with a hammer could damage these vital components!
I picked up a small 12-ton press from Harbor Freight for about $120 – best tool buy in the whole project.
Chapter 13 fully explains all the details about how to polish your C4 aluminum suspension and drivetrain parts.
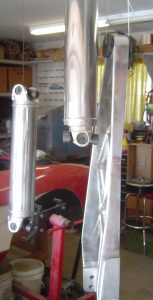
The above axle shafts and C-beam were treated to a clear coating after polishing to a brilliant shine.