1957 Corvette RestoMod Story – Page 18
Chassis & Drivetrain Mock-Up, LS1 & T56
The front and rear suspensions are installed, so now it’s time to slap on the old tires (or leave it up on jack stands), and begin the heavy-duty test fitting.
My project has a Corvette LS1 engine and a six-speed manual transmission. Even though your project may have a different powertrain combination, you still need to test-fit it into the chassis. This is probably where most of the fabrication and modifications will happen – and if your frame builder knows his stuff, it should be very easy.
I can’t say enough good things about Newman Car Creations and the job they did with my frame. So read on and see the plan come together. [NOTE: Newman has retired]
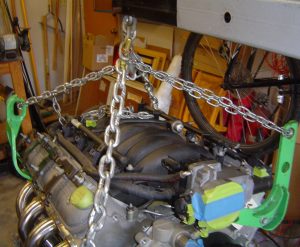
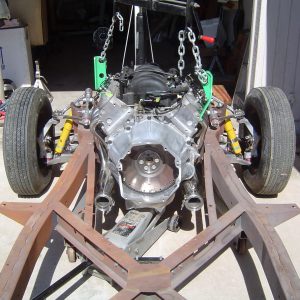
My crate engine came with green lifting bars (above). And I also used bolts in the cylinder heads (metric!) to balance out the load for my engine hoist.
I you don’t have a hoist, good luck. A hoist will be used for more than just lifting the engine – so go buy or borrow one.
The LS1 (and probably other LS engines) have brackets that mount to the block. Then large rubber mounts bolt to the brackets. The mounts have a bolt stud protruding out the bottom to fasten to the frame buckets (see below).
At this writing, I believe GM still sells these rubber mounts.
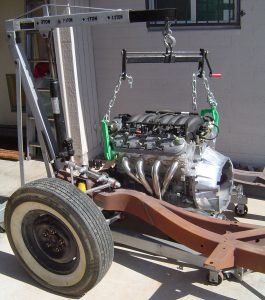
The engine can be installed with or without the transmission attached – I chose the latter. Note that the clutch disk and pressure plate are not installed during mock-up.
With no transmission attached, I supported the rear of the LS1 with a floor jack. So far, no fitment problems have messed with me.
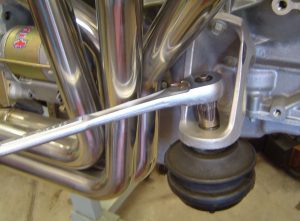
It’s so cool how the headers tuck inside the narrow frame rails of the 1956 frame.
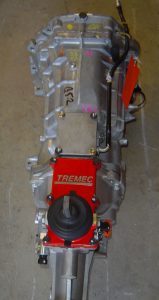
At left is the Tremec T56 double-overdrive six-speed from Keisler (now Silver Sport). With two overdrive gears, highway driving will be smooth as silk. The shifter mount is positioned to the rear for my project.
At right is the fabricated engine mount bucket – they did a great job re-engineering my frame.

Be careful when inserting the transmission shaft into the engine – the shaft must not damage the crank bearings!
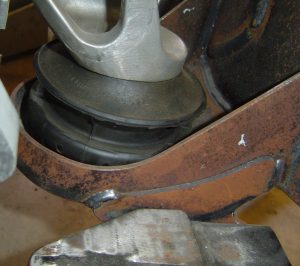
After lifting the tranny into place and securing the bolts to the bellhousing (DO NOT over-tighten these bolts), my first problem reared its ugly head.
The corners of the tailhousing flange did not fit between the frame’s x-member rails. After some quick surgery, the flange and tranny mount were mated up. There’s a lot more involved with this than there is space here to describe it – trust me it took a some effort. But that’s why the book was written; to go into meticulous detail on how it’s done.
Once the tailhousing height was optimized, it was on to the driveshaft.
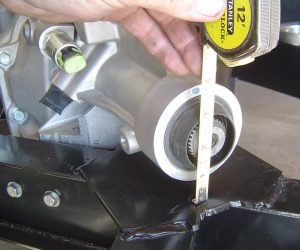
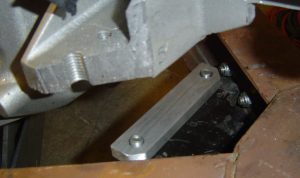
For my project, the best height for the tranny tailshaft housing is 9/16 inches.
This gets the down angle of the tailshaft very close to what is needed (above).
I fabricated shims to adjust the height of the tailshaft upward.
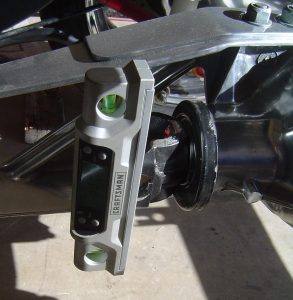
Above, the angle of the pinion yoke at the carrier needs to be measured first.
My brother-in-law, Dangerous Dave, really knows how to choose the right gifts – my digital angle finder.
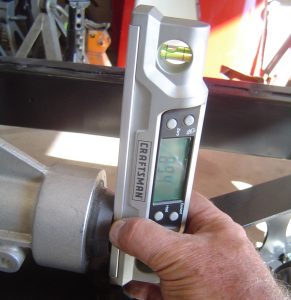
For street applications, the ideal driveshaft angle is 3 degrees. To achieve this, and to correctly phase the driveshaft, the sum of the tailshaft and pinion angles should be 180 degrees.
My driveshaft is at 3.1 degrees down angle and this will definitely help those u-joints at both ends of the driveshaft.
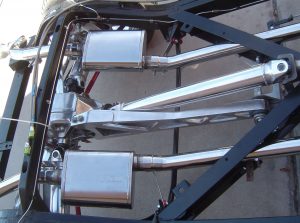
At left is the completed rear suspension and driveline. I polished all the aluminum and stainless steel pieces so they shine like chrome (Chapter 13).
It’s almost a shame to cover these up with the body – no, the ’57 body has a style all its own.
Chapter 11 of my book goes into great detail on how to mock-up the C4 front and rear suspension, and the engine and transmission.