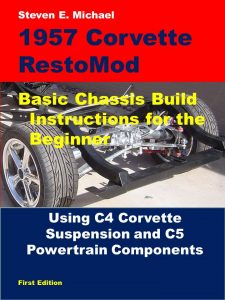
1957 Corvette RestoMod Story – Page 13
C4 Rear Brake Caliper Rebuild
Corvette C4 rear brakes have an integrated E-brake system. To restore and rebuild my brakes, I decided to replace all parts that have worn out, or will wear out. Several rubber pieces need replacing and other mechanical components will either be replaced, or media blasted and painted.
Once disassembled, it’s not difficult to rebuild the rear calipers – although they look really complicated. Do one caliper at a time, and the other one can be a guide to re-assembly.
Chapter 7 of my book covers the tear down and rebuilding of C4 calipers in great detail.
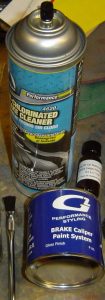
After sandblasting both calipers, they were treated to high-temp caliper paint from Eastwood.
I chose black to match the theme of the car, and because the 1996 Grand Sport had black calipers – not red ones.
The G2 Caliper Paint System comes with paint, catalyst, brush, and brake cleaner. Make sure the calipers are cleaned well before painting.
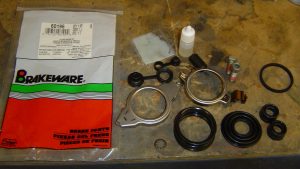
Below is caliper rebuild kit #60196 from Autozone. Each kit rebuilds one rear caliper – and comes with the best instructions I have ever seen! Probably because the kit comes from the same company that makes C4 calipers – PBR Australia . That’s right, C4 brakes are made Down Under!
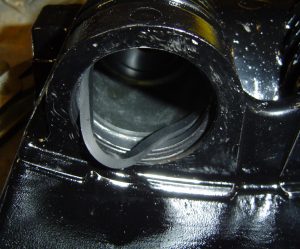
First, we need to replace the caliper bore seal. The seal prevents brake fluid from bypassing the piston in the bore. It is removed using a pick, or worst case, a small screwdriver.
BE CAREFUL! Don’t damage the bore in any way. Any damage may cause leaking or brake failure. The new seal needs to be lubricated with the supplied grease.
Make sure the seal is not twisted in the bore groove. Also, grease the bore thoroughly – but make sure you have cleaned it first with brake cleaner and blown it out to remove all particulates.
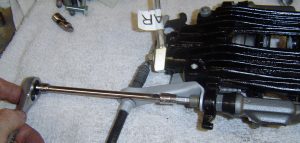
Below is the Clamp Rod / Reaction Plate being removed from the Collar Assembly. It slips out past the inner and outer boots of the collar.

Above is the collar being disassembled. The collar retainers hold the inner (left) and outer (right) boots, as well as, the pushrod (top right), and Actuating Collar (being held).
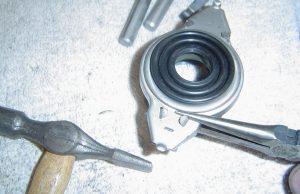
Once the new inner and outer boots are installed in the new retainer plates, the collar is re-assembled. A new Preload Spring is used (top left) – and must be installed correctly.
At top right, is the assembled collar. Make sure the push rod is seated in the groove of the actuating collar, then pinch the ends together with pliers and tap the retaining tabs down. This assembly should be tight with no loose parts.
The kit also includes new Compliance Bushings for the clamp rod (not shown). Lubricate all parts with the supplied grease and slide the clamp rod back into the collar assembly.
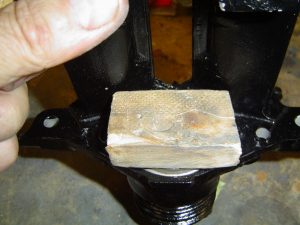
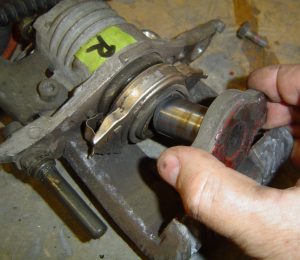
After cleaning the caliper piston with brake cleaner, lube it thoroughly, then push the piston into the bore – it’ll be tight, and that’s okay. Set a small block of wood on the piston and gently tap it down into the bore. I have a small shop press that did this without all the pounding.
But don’t “Bubba” the piston into the bore too far! Only tap or push it until the top of the piston is even with the caliper bore.
Once the piston is seated correctly, insert the Clamp Rod with Collar Assembly into the piston. Then seat the inner boot lip into the bore groove.
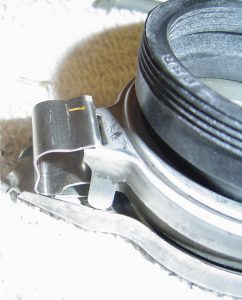
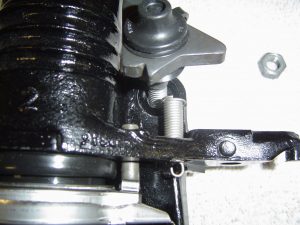
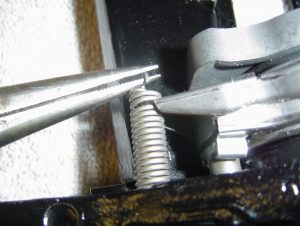
The collar springs are next. They install from the back of the caliper, but don’t install the e-brake lever yet! (right). Use needle-nose pliers to hook the spring to the collar flange (far right). It’s important they attach on the second coil.
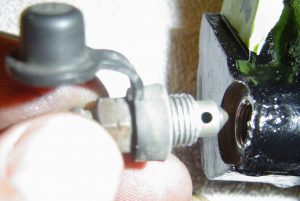
Remove the Bleeder Screw and blow it out with compressed air (left). The kit has a new dust cap for the bleeder.
Also, I strongly suggest you buy new brake hoses. The hose is attached to the caliper using a banjo bolt, which has a hydraulic hole in it. Two copper washers are also needed for the hose install.
Brake hoses are under tremendous hydraulic pressure and any imperfection can lead to catastrophic brake failure.
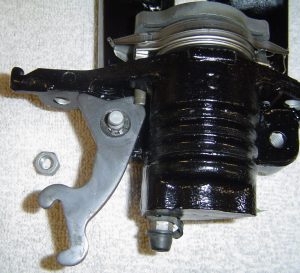
The E-Brake Lever uses a special bolt that fastens the lever to the caliper. The bolt is retained in the lever with a sprag washer, seen at right. Liberally lube the dust boot and lever with caliper lube (I used Permatex). The sprag washer is installed with the teeth facing upward. I used a 12mm socket to evenly push the washer down the bolt and snugly to the lever.
Also note in the right photo that the lever has a notch which contacts the push rod in the collar assembly. When the e-brake is engaged, the lever moves the push rod inward. This also pushes the collar and actuating plate against the inner brake pad. As more e-brake is applied, the caliper moves along the slide pins to contact the outer pad.
Install the brake pads making sure the inner pad has the wear tab indicator. The caliper bracket fits over the pads with each end of the pad backing plate fitted into the notches of the bracket.
Before installing the bracket though, first you need to install the guide pins into the bracket, as described below.
New guide pin boots from the kit are lubed and installed over the pins, and the pins are lubed too.
Then the guide pins go into their caliper bracket housings. Next, the pivot pin is fastened to the caliper along with the abutment bracket, as seen at left.
Use a metric hex-key size HW6 to secure the bolt. The lower guide pin is fastened to the caliper bracket by a regular hex-head bolt.