Rebuild the C4 Dana 36 Carrier
This chapter enters the scary world of “pumpkins”. Most builders would buy a new Dana 36 or 44 instead of rebuilding a used one – and pay three times what it cost to rebuild one.
Chapter 9 shows you how easy it is to upgrade your gear ratio and replace all bearings and seals. The chapter then details exactly how to “set-up” the rear axle correctly – all in your own garage.
Click HERE to access the Bookstore
With 62 pages stocked with 148 detailed photos, no other instruction manual comes close.
We start out by explaining how to make an RPM plan for your project. Gear ratios are explained so you can determine how your transmission ratios interact with your rear axle ratio.
Then, all tools needed are listed, including the specialty tools you need to set-up your Dana 36, along with the suppliers and part numbers.
Next, the tear-down and replacement steps of key components is covered in great detail. Finally, the all-important steps to measure and adjust the set-up of the unit are illustrated with real color photos.
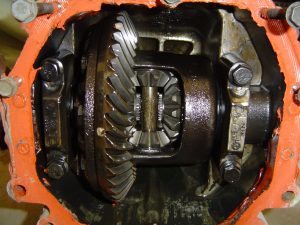
The inside of the Dana 36 looks like an imposing cluster of gears and parts. But really, it isn’t all that complicated.
This chapter shows you the proper and safe way to disassemble the “pumpkin” so that all parts are catalogued, and cleaned for re-assembly.
The critical inspection of parts for wear or damage is then covered, and I give you tips on what to look for.
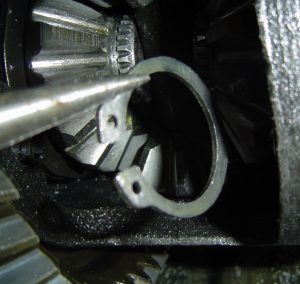
One of the hardest parts of disassembly is removal of the snap rings that hold the two stub axle shafts in the carrier housing.
The hard part is not the actual procedure itself, it’s finding the correct tool to do the job.
Even seasoned mechanics who are not familiar with these snap rings have trouble removing them.
This chapter shows you my three futile attempts and the tools I used. Then, when I bought the correct tool, it took me about 30 seconds to remove the snap rings and allow the stub axles to be removed as well.
And that tool part number is in the chapter, along with where to buy it. Don’t worry, it’s not expensive! It is ironic that the only thing holding the stub axles in place are two parts that cost about two dollars each.
How to remove all oil seals, bearings and bearing cups from the carrier, pinion gear, and differential is extensively covered.
A couple of specialty tools are needed, however they are not as costly as what is recommended by GM. Many tools you probably already have.
When I made mistakes, I show you. Then I illustrate how I corrected the problem. Mostly, when using the shop press, my safety and the safety of the parts were of paramount importance.
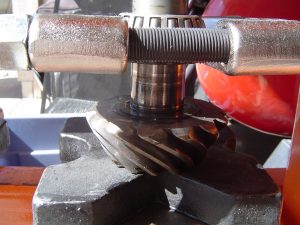
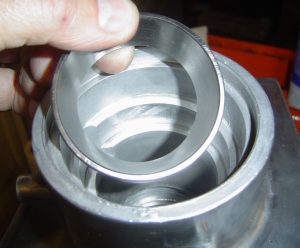
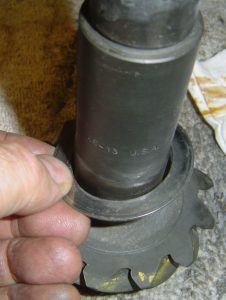
The photo at right is one of the specialty tools needed to remove the tapered-roller bearings from both the differential case and the pinion gear (pictured). This one tool is an absolute requirement to get these bearings off since they are pressed on to the components.
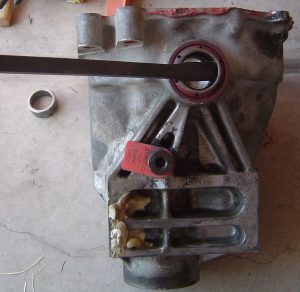
All new bearings are installed in both the carrier, and on the differential.
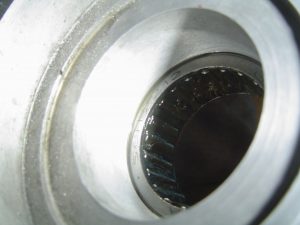
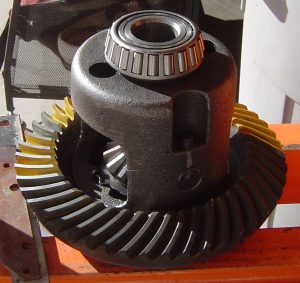
The chapter shows you rolling-pin type bearings used for the axle shafts in the carrier(as seen right); as well as tapered-roller bearings used on areas of the case (differential).
The chapter gives you the best sources for parts to rebuild these important components of the drivetrain. Part numbers included!

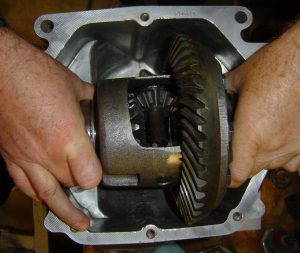
I show the best, and safest, way to remove and install new bearing cups for the tapered-roller bearings (above).
No hammer pounding is used since the carrier is made of aluminum.
Every detail of bearing & cup installation is clearly explained. Bearing functions are also laid out for total understanding of the components and how they work.
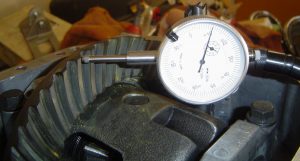
The important tasks of “setting up” the gearing are then covered in great detail. The end of the chapter also includes a handy form that assists you with recording critical measurements after every time you make a change.
The chapter also gives you a plan for maintaining the work area so that parts are installed in the same orientation as when they came off.
 Detailed color photos show you every step to make sure the razor-thin tolerances needed are accomplished. Backlash, pinion depth, differential and pinion preload are all explained in full.
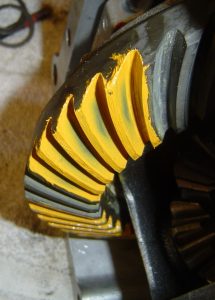
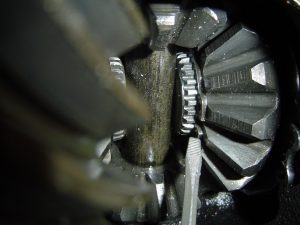
How to read gear patterns on the ring gear are laid out for you with real-world photos, not drawings like other manuals.
I also show you how to create setup bearings so that spacer shims can be easily adjusted to meet the specifications.
No other repair guide has the attention to detail of this chapter. Written by a novice for beginners, all components and tools are explained in great detail.
You’ll not only build your Dana 36 correctly, but you will gain tremendous understanding on how this piece of the drivetrain works.