1957 Corvette RestoMod Story – Page 6
Replace C4 Front Bushings & Ball Joints
The front bushing and ball joint upgrade continues. First, we remove all bushings from the control arms, both upper and lower arms. I replaced these worn rubber bushings with new polyurethane red ones from Energy Suspension. Rubber is nice, but PU is better.
Polyurethane produces a stiffer ride because of their density and strength. And they last much longer. Rubber bushings are susceptible to road and weather damage. To see this, look at your vehicle’s bushings. If they are cracked or breaking apart, time to replace them.
Chapter 5 of my book goes into detail on how I removed and replaced the bushings and ball joints in my Grand Sport front-end.
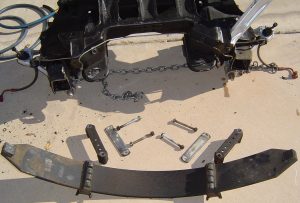
Pictured right is the suspension cradle and the removed leaf spring. The upper control arms have not been removed yet – and be sure to keep the shims and spacers of these arms in correct order.
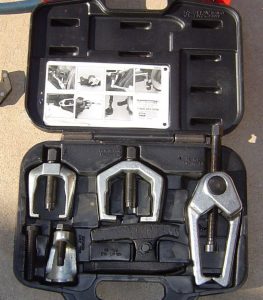
Below right is the puller set from PowerBuilt and was used quite a bit in the front and rear disassembly – as well as some of the bushing removals.
The task of removing the control arms’ bushings and ball joints is complicated by the control arm’s material.
Without a shop press yet, the jobs must be well thought out, so be careful. BTW, I did finally get a 12-ton press from Harbor Freight for $120.
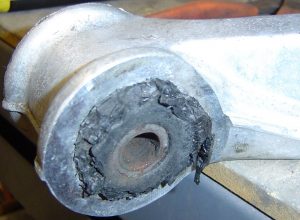
Below, the ball joint in the upper arm is riveted from the factory. You can see I drilled a pilot hole to remove all rivets and release the ball joint.
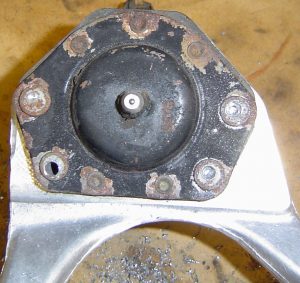
Above: this ball joint is toast. A grinder can also be used to grind off the heads of the rivets, then use a punch to push them out.
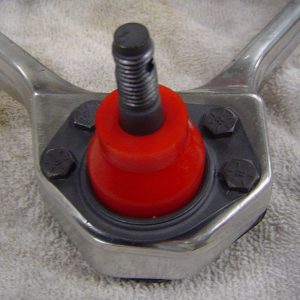
New ball joints from Rock Auto are installed using the nuts and bolts in the kit. The dust boot is from Energy Suspension, and I used it instead of the supplied black one.
The upper control arm is smaller than the lower control arm. This contributes to the incredible handling of the C4 suspension system. Many C4’s have been used as competition cars in autocross due to their excellent cornering characteristics.
Combined with the high-torque capability of the LT4 engine, the C4 platform was a tough car to beat. Autocross is like a mini version of road racing. Cones are used in a “parking lot” setup of the course and tight turns are the norm. Next, I tackled the removal of bushings from the upper control arm.
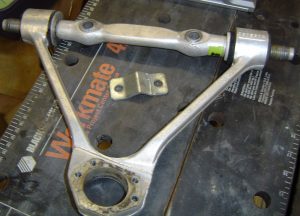
Shown left is an upper control arm. Bushings must be removed by pushing the pivot bar and bushings through both eyelets. A lot of force is needed to do this. If the “Y” arms are not secured somehow, they will bend, possibly beyond repair.
So I came up with a jig on my well-worn B&D Workmate. The jig secured the arm and allowed the necessary force to push out the bushings – a lot of force.
If you want to know how I built my upper control arm jig, you’ll have to buy Chapter 5 of my book – sorry, I can’t give away all of my secrets here. And I also show you how to do this with a shop press.
I tried to secure the upper ends of the “Y” of the control arm, but this was insufficient in preventing possible damage. The “Y” arms started to bend too much, so I backed off and thought about it. My solution was easily accomplished using materials around my garage – stuff that I’m sure you have as well!
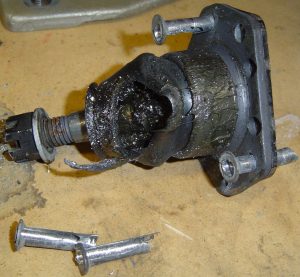
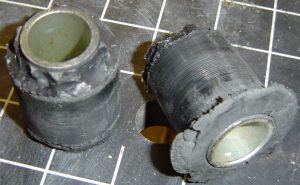
At right, the front and rear bushings have been removed from the upper control arm and pivot bar. Notice the outer end of the rear bushing and the inner end of the front bushing have been torn away – on purpose.
I did this so that extra material did not have to be forced through the arm’s eyelets. It was hard enough just forcing the bushing body through.
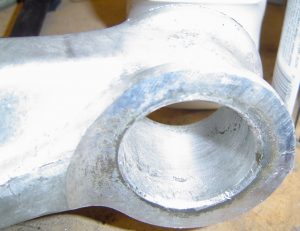
The lower control arm bushings and eyelets are pictured right. A shop press is perfect for removing these bushings, if I had one at that time. The puller tool shown at the top of this page was worthy enough to get the job done. The bushings didn’t go down without a good fight though.
Always be cautious of damaging the control arm. Be aware of how your tools contact the piece, and ALWAYS test your method first. Look to see if the arm’s shape integrity is being altered.
Well, the upper and lower control arm bushings are extracted – Whew! And the upper ball joint rivets have been drilled and punched out so the joint literally fell out of the upper arm. But what about the lower ball joints, you know, the ones in the larger control arm?