1957 Corvette RestoMod Story – Page 16
C4 Front Suspension Test Fit
No surprises! That’s why we test fit the suspension – to make sure every component fits correctly. Any parts that attach to the frame, or chassis-to-body, should be mocked-up and assembled. Some say this creates extra work – “why not just fit everything on final assembly?”
Mock-up is done for two very good reasons. If the frame, suspension, or body need modifications, then doing those after paint will ruin your project.
Also, the parts you plan to use may not work well together. Sure, vendors will say their parts are “bolt on”, but don’t believe it. This page gives brief descriptions of how to mock-up my 1957 Corvette RestoMod using C4 suspension.
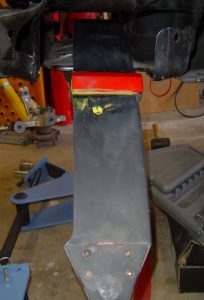
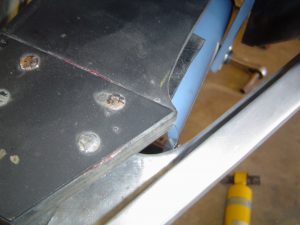
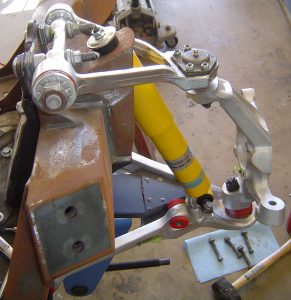
We start with the transverse leaf spring. At left, you see it fits through the tunnel of the cradle.
The red spacers on top of the spring are made by Guldstrand Motorsports. the late Dick Guldstrand was a Corvette performance legend. The new spacers lower the suspension by about one-half inch.
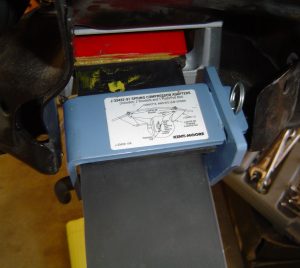
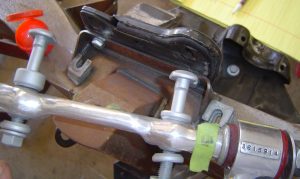
Below is a test-fit of the spring using its two center mounting brackets. The lower part of each bracket holds the bottom bumper of the spring. The J33432 tool then “flattens out” the spring to easily hang the other suspension parts.
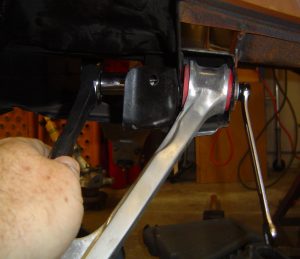
Wedge the lower control arms into the cradle brackets (left). Use the supplied bushing grease from Energy Suspension .
A problem I had was with the spring compression tool. If not positioned correctly, the ends of the leaf spring would interfere with the lower control arm. After re-positioning the tool, the arm was free to move (right).
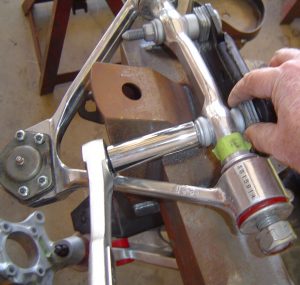
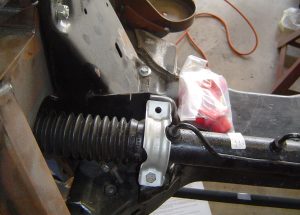
Next, install the upper controls arms to the cradle bracket (right photo).
Note the factory shims sitting on the frame, just above the arm’s pivot bar. These shims must be installed the same way they came off – that’s why you were so careful during disassembly to keep them in order.
If you didn’t do this, then alignment of your front-end will be a laborious adventure.
The bolts that fasten the upper arm to the cradle have locking shoulders. These keep the bolt from spinning in the cradle. The shims and spacer washers need to be in their original positions.
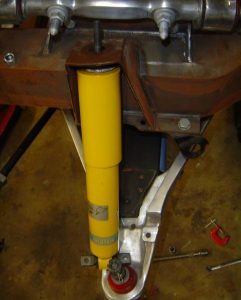
Shock absorbers are next, but not right away (left). The steering knuckle is positioned on to the upper and lower ball joint studs of the control arms (right).
When the knuckle is loosely threaded on the ball joints, then fasten the shock’s lower bracket to the lower control arm. Now you can tighten the ball joint stud nuts. Do not install the cotter pins yet.
Then the upper bushing, washer and nut of the shock is tightened.
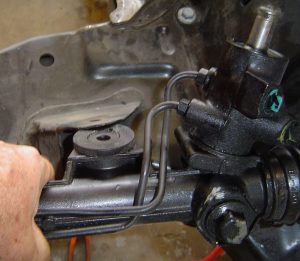
The rack & pinion steering gear goes on next. It’s located on the cradle, which has mounting brackets.
Move each side through the cradle and attach the driver’s side into the cradle’s bracket (left). Then the right side by use of a bolted bracket (right).
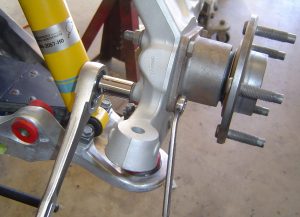
Bolt the hubs next (above). The long bolts must enter through the wheel flange.
Chapter 11 of my book has step-by-step instructions on test-fitting the C4 front suspension.
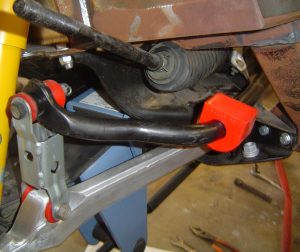
Now you can attach the sway bar end links and brackets. Use the sway-bar-to-frame brackets to loosely fasten at the frame.
All fasteners here only need to be snugged down, not torqued to specs. After all, we must tear it down again to make the frame ready for power-coating.
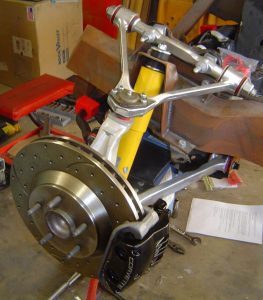
Brake calipers can then be bolted to the steering knuckles. But if your rolling chassis wheels interfere with the calipers, no problem. Just wait until you have your new custom wheels.
The finished assembly should look like the above photo. Once the spring compressor is removed, it’s okay for the chassis to sit on the ground – with wheels and tires of course.