1957 Corvette RestoMod Story – Page 1
1957 Corvette RestoMod Story
Have you ever tackled a project you knew was over your head? Me too. These pages are a pictorial and descriptive history of my Corvette RestoMod project.
Ten years in the making, this project shows beginners the right and wrong ways to restore and customize your dream car project (or at least my dream car project).
You read the do’s and don’ts that I experienced, and all without scraping your knuckles.
Here’s the best part, I’m a novice at vehicle restoration – ENJOY!
Here’s my 1957 Corvette before disassembly started. I’m trying to clean the rear axle – very greasy! I dismantled the car the next year to start restomodding.

In 1997, I bought my first Corvette – a 1957 roadster. It was a 20/20 car. It looked good going 20 miles per hour from 20 feet away. I drove it around a little while, but it had a nasty habit of running too hot. I took it to Phoenix International Raceway for a Corvette club function that allowed us owners to drive the road course. I stopped less than halfway through due to overheating – that sucked.
My wife and me used the car to get ice cream. The car always brought a lot of attention from other ice cream lovers. One Christmas day, I gave rides around my neighborhood to all my relatives. Each one had a big smile on their face during the entire time. Then one day while backing out of the garage, the brakes failed – pedal to the floor. There was a leak in the master cylinder and all of the brake fluid had run out. So, I decided that was a good time to take the car apart and begin the restoration. Little did I know…
For those who do not know, a roadster is a convertible two-seater. Chevrolet did not include a hard-top, but it was an available dealer option. If you bought the hard top, you needed at least two strong people to lift it and set it into place. It was then bolted to the body, and voila – a Corvette hard top!
Anyway, back to my baby. The car was worked on before I bought it, but it was far from being a top-level restoration. I decided to restore the Vette to showroom standards, or better. But the more I took it apart the less original parts I found. To bring this car icon back to original condition would be extremely expensive – and I changed my plans. I had read and listened to other owners say that before you begin any car project, you first need to decide what you want the car to be. Sounds easy enough, but there’s more to this than first meets the eye.
I wanted to drive the car, not just go to car shows. No overheating, no braking problems, just a reliable and beautiful Corvette to drive. I wanted my wife and me to take it out on the open roads of Arizona, up in the mountains and away from the stifling summer heat in Phoenix. I did not want a “trailer queen”. That’s what restored classic cars are called when they are rebuilt to showroom standards and trailered to car shows and competitions. Only to get a trophy and some kind of bragging rights. Sorry, not my style. I want to be the guy in the performance Corvette blowing by the trailer queens with my top down and my hair on fire (or what’s left of it).
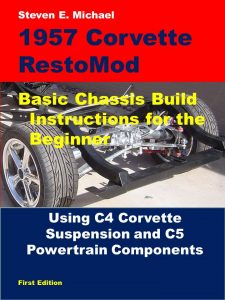
In 2000 I changed my rebuild goal to create a RestoMod. This term is used in the car hobby to mean a car that looks stock but has late-model mechanical components. First, I bought a 1999 Corvette LS1 engine. Next was a 1995 Corvette rear axle and suspension assembly. Finally in 2008, I purchased a 1996 Corvette Grand Sport front suspension and steering assembly. These late-model components would be mated to a re-engineered 1956 Corvette frame to form the foundation of the car.
The frame re-engineering was not done by me – no, no way too advanced for me. I drove the frame to Newman Car Creations in Templeton, CA. Paul and wife Michelle have been doing quality RestoMod frame upgrades since 1990. On January 19, 2009, my frame was finished. I drove up in early February to pick it up. [Note: As of August 2016, Newman has retired]
By the way, if you think you can do what Newman does, think again. Years of experience in engineering the angles, dimensions and geometry of frames is why Paul Newman is the best. Without his knowledge, you or I should not even attempt this kind of work. It’s worth every penny to have an expert build a new frame; or rebuild yours.
My RestoMod project started in early 2009 and now it’s late 2021. The chassis is completed. The body’s fiberglass is repaired and modified. The body is painted a beautiful midnight blue with black candy – and five coats of clear. It’s color sanded and polished. The car is wired (Painless Performance) and it runs and drives. Just a few paint repairs and final assembly can happen next.
The fiberglass repair and my modifications took a year and a half. (I can’t work during the summer months in Phoenix, I’d just melt).
Wider rear quarter panels, a complete front end clip (from the top of the dashboard to the grille), custom exhaust cutouts, seat surrounds, custom speaker enclosures, and all body-leveling and gaps were completed. The rear inner wheel wells were tubbed, customization to the speaker boxes and center console with a re-positioned glove box, and then I moved on to the paint prep. That’s right, I painted this baby myself! I rented a professional paint booth from a commercial shop and completed the entire job in about 8 hours. The owner of the shop must have been impressed because he asked me if I wanted a job. I had to pass – one is enough for me.
People ask me all the time when it will get done. I usually say one of two things: “Listen, I want to drive it way more than anyone”; or, “It’ll get done when it’s done.”