1957 Corvette RestoMod Story – Page 17
C4 Rear Suspension Test Fit
The rear-end mock-up includes test-fitting parts of the suspension and drivetrain. Again, the test-fit process ensures there are no surprises during the final assembly. Any modifications to the frame, or the parts, are done during this phase. And importantly, all hardware is specified and test fit.
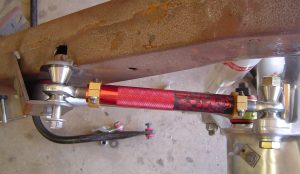
Also, any performance parts you want to add for an upgrade can be fitted and modified if necessary. I went with more adjustable trailing arms and cam rods from Banski– and they fit great!
Some may say this mock-up stage is useless – but if the best car builders in the world do it, how can it be useless? Read on to see how I did it…
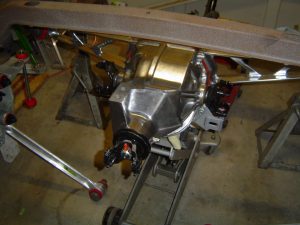
The first order of business is to get the carrier in position and fastened in place. At left is my carrier supported by a floor jack as it is lifted to the correct height. From there, one side’s bolt can be inserted and the other side is fairly easy to bolt up.
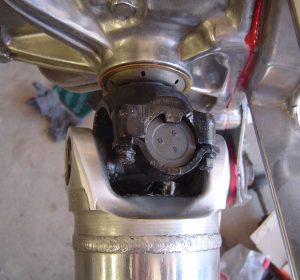
New polyurethane bushings were installed in the batwing eyelets (Chapter 8) from Energy Suspension – and I show you a few tricks on how to install those very stout bushings.
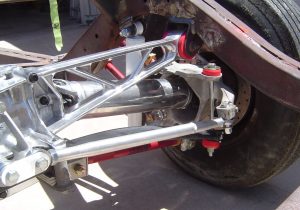
The front of the carrier and driveline are supported by a torque arm from Newman Car Creations. The torque arm attaches to the carrier (see below) and to a cross member that’s bolted to the X-member of the frame (right photo).
The cross member and frame need holes drilled to mount the torque arm. Be prepared to be on your back for a while drilling these holes – the frame’s metal is really tough to get through. Or maybe it was just my drill bit…
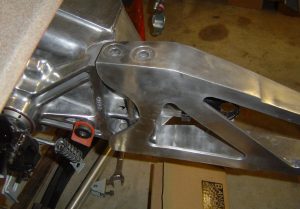
The new torque arm attaches to the carrier using the stock long bolts. The other end mounts to a custom cross member that’s bolted to the X-member in the frame.
The fit was tight, but with a little sanding and some persuasion with a dead-blow hammer, it fit nicely.
The torque arm helps maintain the pinion angle of the driveshaft, and also provides some protection from road rash.
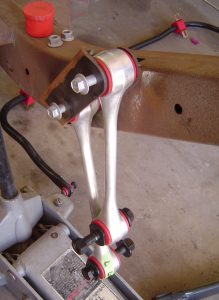
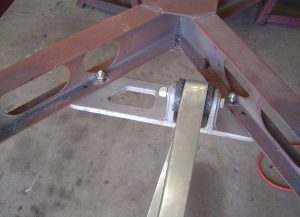
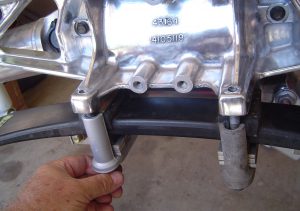
The trailing arms (control rods) keep the axles from twisting under acceleration, and are attached the custom brackets on the frame (left).
Sometimes called “dog bones”, these C4 parts have a racing pedigree known as the “4-link setup”.
The other end of the control rods attach to two points on the spindle knuckle (right photo). When the wheels go over bumps, the control rods articulate up and down easily while still preventing axle twist.
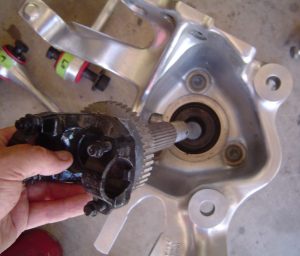
The independent rear suspension of the C4 has two axle shafts that connect to the carrier yokes and the hub yokes using universal joints (Chapter 8).
At left is the axle yoke being inserted into the knuckle. At right is the u-joint connecting the axle shaft and carrier stub axle yokes. Special care should be taken when installing these parts.
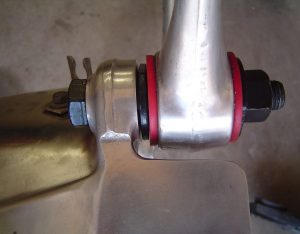
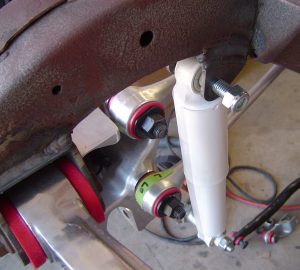
Shock absorbers connect to a frame bracket on top, and a special bolt at bottom. The bolt has a new flange welded on it by Newman Car Creations (who also modified my frame). The new flange fastens the sway bar end-links.
Each knuckle should be supported by jack stands to 3 inches below the bump stop before installing the shocks.
At right is the shock, control rods, and carrier batwing connections from the left side.
Safely installing the transverse leaf spring is difficult, and possibly dangerous, without the right tool. A spring compressor from OTC , the J33432, is the best way to compress this spring safely – but it’s expensive!
At left are the center mount brackets that secure the spring to the carrier. One of my brackets broke (they’re cast aluminum) so I found another pair from a salvage yard.
Factory shims are used inside the brackets to set the desired ride height.
Check out Chapter 11 of my book for details.
At right are the adjustable control rods from Banski Motorsports. I used these, and their spindle rods instead of the stockers. Great components!
Chapter 11 of my book has a supplemental section on how to install these great parts.
At right is the completed right side of my suspension. Bolts are only snugged down because this will all have to be blown apart again.
The frame will be sanded and powder coated. Then it’s time for the final assembly of the chassis.