1957 Corvette RestoMod Story – Page 20
Sanding & Polishing C4 Suspension, Part 2
Before assembling your chassis for the last time, why not freshen the look of your C4 suspension? This may not be for everyone (patience is definitely needed), but I just can’t do anything halfway – it’s a curse.
This page is a continuation of page 19 where sanding and polishing was first described. This page deals with some of the problems I encountered while making these components into BLING pieces.
You can also read about Chapter 13 of my book. The chapter has 145 photos in 52 pages, along with detailed explanations of the methods and results of this very labor-intensive process. Page 19 dealt mostly with tools, so let’s get into the end results!
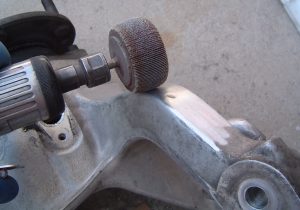
Gouges (left) and pilings, or other imperfections are tackled first. Here I used a 120-grit flap wheel and die-grinder to remove the deep gouge in the spindle knuckle.
Die-grinders spin up to 18,000 rpm’s, and do a lot of damage with aggressive attachments like this flap wheel, or the Roloc disk (see below).
Not all areas of each part need this type of sanding to start with – some only need hand sanding. Chapter 13 explains the difference and the best tools for each job.
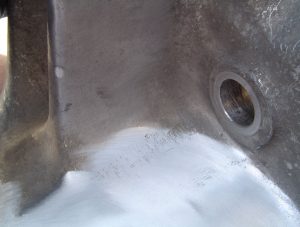
Some bad surfaces are made by the casting of the part at the factory. Seen right is pitting of the spindle knuckle.
The chapter goes extensively into how to prepare these types of surfaces for polishing.
Tools and supplies are listed for you, and the best instances to use each one. Importantly, the purpose of each sanding step is also clearly outlined for you.
Some people ask me how long it took to do all of this. I don’t really know, but if I had to guess, it’s north of 400 hours.
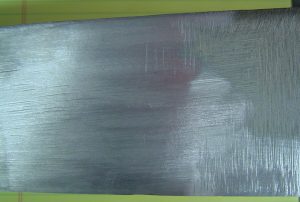
At left, casting or cutting marks are seen on this piece. This is how the part came to me.
Hours of hand sanding can certainly remove these, but they’re very deep scratches.
This chapter shows you the safest and quickest way to smooth surfaces like this with power sanding. And it also gives you plenty of situations where power sanding is NOT advisable. In fact, it may cause you more work than what you started with.
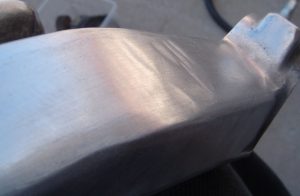
At right is one area of the spindle knuckle where my technique with the die-grinder and Roloc disk was less than stellar.
I go on to explain how to avoid these mistakes, then illustrate the best steps to cure the problem – only if you happen to make the same mistake.
Aluminum may look hard as steel, but it isn’t. Chapter 13 gives you all of the do’s and don’ts of power sanding.
For every suspension piece, the best way to get the surface prepared for polishing is hand sanding.
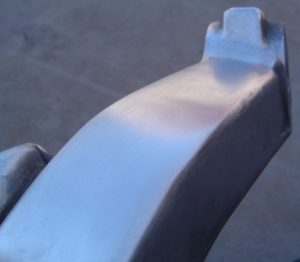
At left, the gouges made by my mishandling of the Roloc disk disappeared due to hand sanding. Concave surfaces of the front and rear knuckles are the most difficult for power sanding or surface manipulations, so hand sanding is the only way to go.
In Chapter 13, I show you how to read the metal’s surface before you start. This then tells you what grit of sandpaper to use – or if the more aggressive method of power sanding is needed.
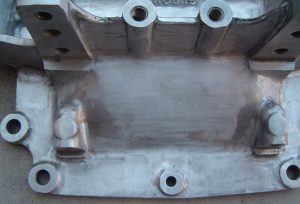
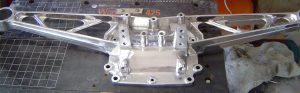
Above is the “batwing” carrier cover for the Dana 36 axle. A first pass at power sanding is done, so now a few hours of hand sanding is needed.
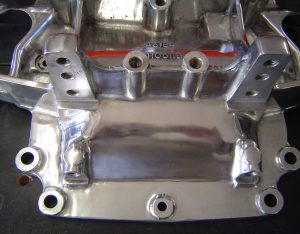
Sanding, sanding, and more sanding. Then polishing with mini-buffs (two passes with differing compounds), and this cover is spectacular!
The arms of the carrier cover were much tougher than the body of the cover – by far. I made some mistakes early on, but recovered to make this rear-end piece shine like chrome. Too bad the body has to cover this up.
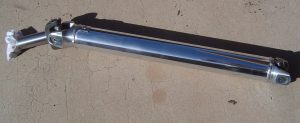
I used a 3-inch aluminum driveshaft in my project. When I hear “aluminum”, I immediately think – polish it.
Below is the completed driveshaft. A rag is stuffed into the left end to protect the splines that mate to the transmission tailshaft.
It’s interesting, but sanding rounded surfaces is much easier than the compound curves of the front and rear steering knuckles. Looks great, right?
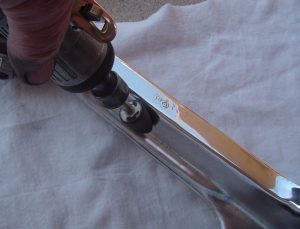
Above is the arm of the front lower control arm. I’m using my die-grinder and a buffing cone on the final polishing step. These turned out brilliantly!
Time, persistence and attention to detail are keys to successfully polishing these components. And all the hours you put in will pay off in the end.
No other reference work comes close to the level of detail and photos in Chapter 13. As a novice, my explanations are extensive and you reap the benefits of all my mistakes!
Back to Page 19 Try the Bookstore!